Blog

  • How to Join JTF2: CANSOFCOM Units Explained

    How to Join JTF2: CANSOFCOM Units Explained

    Canada’s military has conducted special operations warfare for almost a century, beginning with the 1st Special Service Force, which was a joint unit of American and Canadian commandos during World War II. Since then, Canada has been regarded as having some of the most elite and professional soldiers in the world.

    But what Special Forces does Canada have today?

    Prior to World War II, Canadian soldiers became well-known by their actions during The Great War in the battle at Vimy Ridge. While the American and British troops were unable to advance and overtake the German soldiers, the Canadians marched toward the German trenches in what was called a “creeping barrage“. The Canadians took Vimy Ridge with less men than the Allies had in casualties!

    Not much is known about Canada’s Special Forces capabilities, or that Canada has Special Forces units at all! But there are numerous testimonies from other Special Forces operators who have worked alongside Canadian Special Forces and have made comments on how good they really are, sometimes to their surprise.
    cansofcom

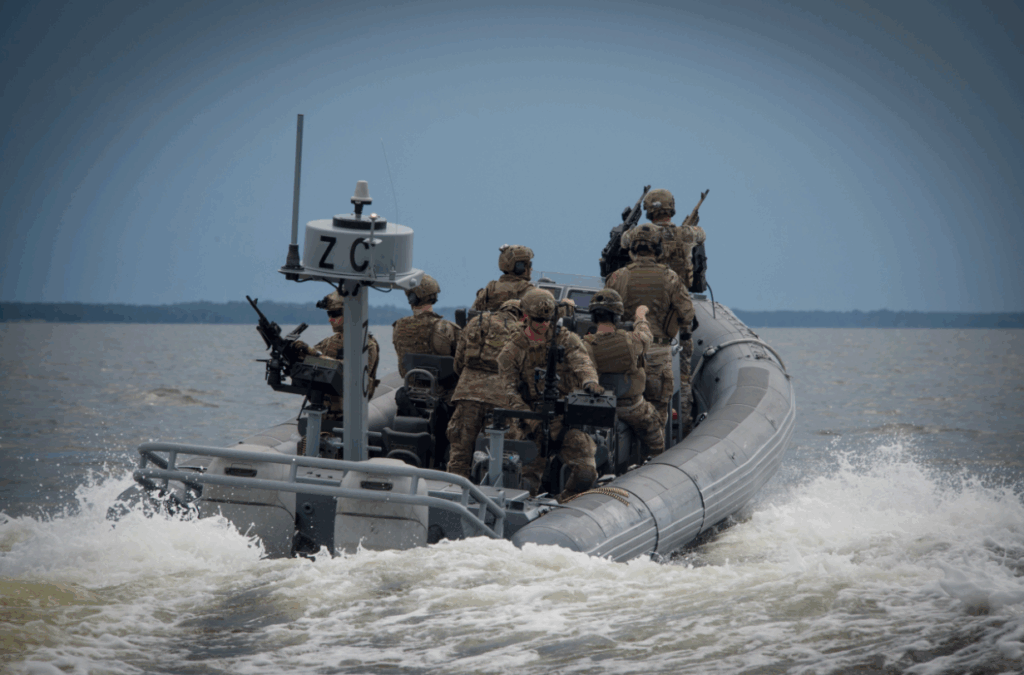
    The Canadian Forces is broken down to three elements. The Army, Navy, and Airforce. Outside of these three is what’s called CANSOFCOM, which is short for Canadian Special Operations Force Command.

    Within CANSOFCOM there are five individual units that work together to achieve mission success.

    Joint Task Force 2 (JTF2)
    cansofcom jtf2

    History of JTF2

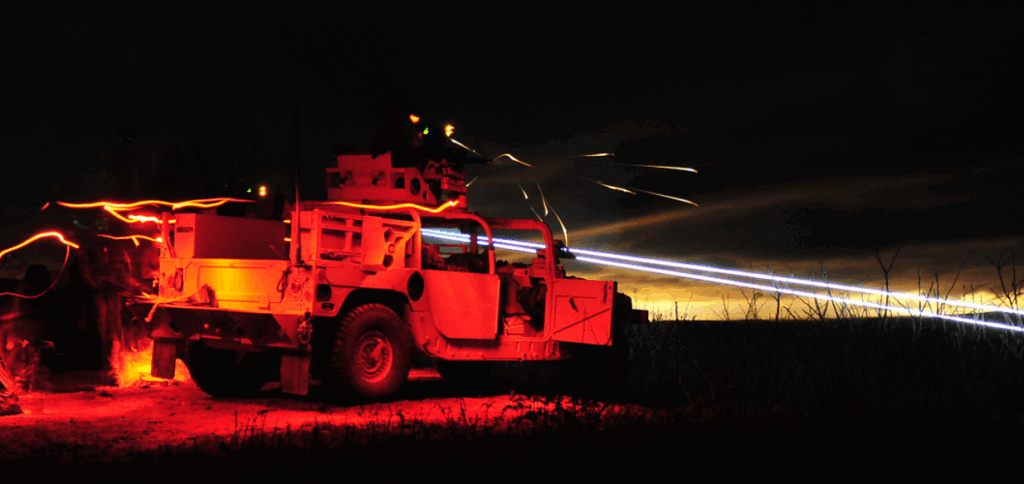
    JTF2 is the Tier 1 unit within the Canadian Forces, and they’re often compared to units such as Delta Force and SEAL Team 6 (DEVGRU).

    JTF2 stood up in 1993 in order to conduct hostage rescue and counter-terrorism operations on Canadian soil, a responsibility which formerly belonged to the RCMP (Royal Canadian Mounted Police).

    Very little is known about JTF2. After three decades, there are only a handful of individuals who have been in the unit that have given us a glimpse of what takes place.

    A book released by a former JTF2 assaulter, who was a part of the unit when it stood up, wrote a book titled “We Were Invincible”. This book was written in French, but is available in English for e-readers.

    Other JTF2 assaulters who have shared some of their experiences, while still keeping things relatively secret, are Dallas Alexander (featured on the Shawn Ryan Show and other podcasts) and Randy Turner on his YouTube channel Direct Action Performance.

    How to join JTF2

    In order to join JTF2 you must complete the following:
    – Reg F: Served minimum 12 months after attaining Occupation Function Point (OFP)
    – Res F: no minimum service, but must meet OFP
    – Meet the minimum medical category
    – Pass Military Swim Test
    – Pass Pre-Selection Physical Fitness Evaluation (submit with application)
    – Possess an unrestricted Provincial Drivers License
    – Submit your Notice Of Intent (NOI) to receive guidance/support from CANSOFCOM
    – Send application for Occupation Transfer through CoC to the BPSO

    If you’re having difficulty obtaining the requirements due to operational tempo (swim test, fitness test, etc) you should reach out to the respective CANSOFCOM units selection and training cell for guidance.

    What is the Pre-Selection Physical Fitness Test for JTF2?

    Applicants for JTF2 must be able to perform the following standards for each test and achieve a total accumulative score of a minimum of 75 points.

    • 2.4 km run withing 9 minutes and 45 seconds
    • 40 push-ups without stoping
    • 40 sit-ups within 1 minute
    • 5 continuous pullups
    • 1 Rep Max bench press of 145 pounds

    Applicants for JTF2 are applying against others to be able to go to the Selection Phase, so meeting the minimum score wont make you that competitive. So, you should do your best to prepare for this portion of the selection process since your score will be compared to others’ scores.
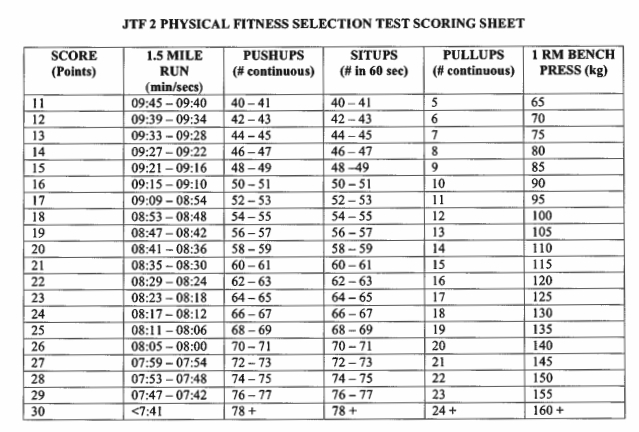
    As you can see, passing the minimum requirements from each test is only worth a total of 55 points, and therefore not achieving the minimum score of 75 points required.

    If you take 75 and divide it into 5 tests, the average score is 15 points for each test. So if you struggle with running and can only attain 11 points, but your bench press is strong and gets you 20 points, as long as your average is 15 points per test, then you’ll be fine. But again, that’s only for meeting the minimum requirements.

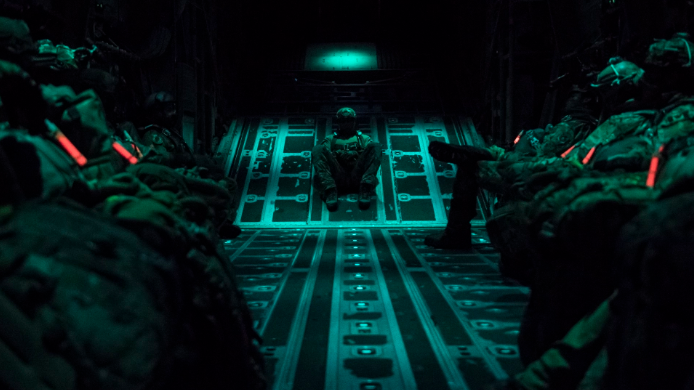
    Canadian Special Operations Regiment (CSOR)
    cansofcom csor

    History of CSOR

    CSOR is Canada’s Tier 2 special operations unit which stood up in 2006 in order to support JTF2.

    A comparison to the Americans would be similar to their Rangers or Green Berets. These units are Special Forces and can carry out missions on their own but are also used to support their Tier 1 brothers. Members typically make the step from the Rangers or Green Berets up to Delta, not the other way around.

    CSOR can work independently in places around the world, but they are also used to support JTF2 missions.

    CSOR has been used to help train foreign soldiers in areas such as marksmanship and counter-terrorism, like in the Sahara-Dessert back in 2014 as seen on CTV W5 special program SECRET WARRIORS.

    How to join CSOR

    In order to join CSOR you must complete the following:
    – Reg F: Served minimum 12 months after attaining Occupation Function Point (OFP)
    – Res F: no minimum service, but must meet OFP
    – Meet the minimum medical category
    – Pass Combat Swim Test
    – Pass Pre-Selection Physical Fitness Evaluation (submit with application)
    – Possess an unrestricted Provincial Drivers License
    – Submit your Notice Of Intent (NOI) to receive guidance/support from CANSOFCOM
    – Send application for Occupation Transfer through CoC to the BPSO

    What is the Pre-Selection Physical Fitness Test for CSOR?

    Applicants for becoming a Special Forces Operator must be able to perform the following standards for each test and achieve a total accumulative score of a minimum of 75 points.

    • 2.4 km run withing 9 minutes and 45 seconds
    • 40 push-ups without stoping
    • 40 sit-ups within 1 minute
    • 5 continuous pullups
    • 1 Rep Max bench press of 145 pounds

    Special Operations Technical Collection Operator (SOTCO)
    cansofcom cjiru sotco

    History of SOTCO

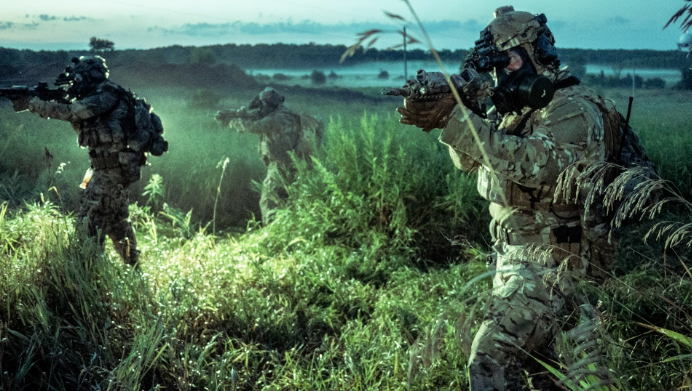
    Formally known as Canadian Joint Incident Response Unit (CJIRU), SOTCO role is to respond to CBRN threats at home and abroad.

    Canada’s first CBRN Defence unit was No. 1 Radiation Detection Unit (1RDU) established in 1950 with years of changes in capabilities, titles, and reasonability transfers with the RCMP. Following the 9/11 attack in 2001, the Canadian Government became motivated to increase its CBRN Defence capability by establishing the Joint Nuclear Biological Chemical Defence Company (JNBCD Coy). This unit supported JTF2, and when CANSOFCOM was created in 2006 it became a part of the organization and re-designated as CJIRU.

    How to join SOTCO

    In order to join SOTCO / CJIRU, you must have completed the following:
    – Complete 12 months of service after attaining Occupation Functional Point (OFP)
    – Meet the minimum medical category
    – Have a valid driver’s license with no restrictions
    – Level II (SECRET) security clearance
    – Meet SOTCO Fitness Entry Standard (see below)

    What is the Fitness Entry Standard for SOTCO?

    The fitness entry standard for SOTCO is the following:

    • Hand Grip Test combined left and right must be greater than body weight (kg) + 20 kg (example: 80 kg person + 20 kg = 100 kg, so left + right grip must be greater than 100 kg.
    • 72 kg Loaded Squat x 11 continuous reps
    • 5 constitutive Pull-Ups
    • 40 Situps in 1 Minute
    • 20 Meter Shuttle Run (Beep Test) must achieve Level 8
    • Basic Military Swim Standard

    427 Special Operations Aviation Squadron (427 SOAS)

    cansofcom 427 squadron

    History of 427 Squadron

    427 Squadron was established as a Bomber Squadron during WWII in late 1942 and disbanded less than 4 years later in June 1946. It was then reformed as a Fighter Squadron in 1952, and then changed again to a Nuclear Strike Role in 1962, and disbanded once again in July 1970. Less than 1 year later in January 1971, the squadron was reestablished as 427 Tactical Helicopter Squadron flying the CH-135 Twin Huey.

    Fast forward 23 years later when the RCMP’s Special Emergency Response Team transferred its responsibility to the newly formed unit JTF2 in 1993, 427 Squadron also took the responsibility of flying for the elite unit, which was previously fulfilled by 450 SAH Flt (SERT Assault Helicopter Flight).

    What aircraft does 427 SOAS use?

    427 SOAS is a tactical aviation squadron that currently flies the CH146 Griffon, a utility helicopter made by Bell Helicopter similar to the Marine Corps UH-1Y Venom, designed for troop transport. The CH146 Griffon at 427 SOAS are painted with a blue paint scheme so as to not look militaristic. 427 SOAS also utilizes guns on the Griffon to use for self-defence, such as the .50 Cal Machine Gun or C6 GPMG.

    Previous aircraft include the Griffon’s predecessor, the CH-135 Twin Huey, as well as the CH-178 which were the Russian made Mi-17 Helicopter on lease and used to fly covert Special Forces missions in Afghanistan.

    At the time of this writing, the RCAF is looking into acquiring up to 19x UH-60M Black Hawk helicopters to be flown by 427 SOAS.

    How to join 427 SOAS

    In order to join 427 SOAS you must submit your NOI (Notice Of Intent) that you wish to join the organization. There is a screening process of the candidates in order to determine if applicants are a proper fit for the Special Operations Aviation Squadron.

    Canadian Special Operations Training Centre (CSOTC)
    History of CSOTC

    Established in 2012, CSOTC mission is to provide training and education to CANSOFCOM personnel. Although it’s the most recent unit in CANSOFCOM, it was a desired concept during the original birth of CANSOFCOM in 2006, but due to the ongoing war in Afghanistan it was not created until years later.

    CSOTC is always incorporating addition methods of training to CANSOFCOM support personnel in order to make sure they are ready to meet the high demands of supporting JTF2 Assaulters and Special Forces Operators.

  • Is the MIRA Safety CM-6M Gas Mask worth it? Full Review

    Is the MIRA Safety CM-6M Gas Mask worth it? Full Review

    MIRA Safety is known for making high quality, rugged, and very reliable gas masks to protect you against CBRN agents. The MIRA Safety CM-6M Tactical Gas Mask is perfect for military members, law enforcement personnel, and everyday citizens who require CBRN protection. The MIRA Safety CM-6M Tactical Gas Mask is the best tactical gas mask on the market, and almost identical to my military issued gas mask that I’ve used for years.

    During my time in the military, we would conduct CBRN training every couple of years. The agents we learned about that could be used against us are no joke. That’s why I believe that not only military personnel, but everyday citizens should have the ability to protect themselves against CBRN attacks. With advancement in technology, the West is no longer out of reach from our foes.

    Chemical agents used to cause irritation will try to make entry into your mouth, nose, and eyes. That is why having a full-face CBRN gas mask is of most importance when protecting yourself against CBRN agents. Taking a step further and having a full bunny-suit would be a good idea as well. In the military we would practice getting suited up in our full HAZMAT outfit within a certain amount of time.

    Mira safety gas mask review

    Features

    20 Year Shelf Life
    Bromobutyl Rubber (CBRN protection)
    Large Visor for wide-angle view
    Fits up to two 40mm NATO filter cartridges
    Includes hydration system & canteen
    Helmet compatible
    Meets EN 136:1996 class III requirements
    EN 168 impact protection compliant

    Pros

    Durable
    Compact
    Affordable
    NATO filter compatible
    Long shelf life
    Full visor
    Canteen included

    Cons

    Filter sold separately
    One size fits most

    Cost

    At the time of this article, the MIRA Safety CM-6M Tactical Gas Mask costs $390. Use my discount code TGG10 for 10% off your order!

    Check MIRA Safety for the latest pricing.

    You’ll need to purchase a filter as well, which vary in price depending on the level of protection you need. I also recommend spending a few dollars on the PROFILM Visor protectors for the CM-6M.

    First Impression

    I was very pleased when I first opened the box to the MIRA Safety CM-6M Gas Mask. It looked and felt just like my standard issued Military Gas Mask, which has performed well every time I’ve used it.

    The MIRA Safety CM-6M Gas Mask included a water canteen, which was identical to the military issued water canteen. I chuckled to myself because the canteen in the military was probably used by 20 other people before I got it! But now I have a brand-new canteen that will work with both the MIRA Safety Gas Mask and my military gas mask. The MIRA Safety water canteen does feel a bit lighter in comparison, but other than that there’s no difference.

    One thing to make note of is that the MIRA Safety CM-6M Gas Mask does NOT include a filter cartridge, so you’ll have to purchase one of those separately on MIRA Safety’s website. They’re fairly inexpensive though. I’m given one when I conduct CBRN training, so I didn’t require one from MIRA Safety. Which brings me to my next point!

    The MIRA Safety CM-6M Gas Mask is compliant with 40mm NATO filter cartridges. Because of this, I can use this mask oppose to the standard military issued mask. One of the reasons I would prefer using the MIRA Safety Mask over my military mask (other than the fact that a bunch of dudes had their face in my military gas mask) is the full face visor on the MIRA Safety Gas Mask and not the dual-circle eye lenses on my military mask.

    CBRN Protection

    Having a gas mask doesn’t mean anything if it doesn’t protect you against CBRN threats. What are CBRN threats you ask?

    CBRN stands for Chemical Biological Radiological Nuclear. Wearing a CBRN gas mask with a canister is meant to protect you from these threats. Depending on the severity of the threat, you may need to also wear protective clothing that is rated for CBRN threats. But for threats that can only cause internal damage by inhalation, a CBRN mask will be what you need.

    You might be thinking to yourself that CBRN threats aren’t that serious and unlikely to be a reality. Sure, the odds of a CBRN attack happening near you may be slim-to-none. But spending a few hundred dollars on a piece of equipment that is guaranteed to protect you from those threats is a small price to pay in the grand scheme of things.

    Head Panel and Straps

    One of the differences I have noticed with the MIRA Safety CM-6M Gas Mask is the back head-panel material. On my military gas mask, as you can see above, it has a softer material with more stretch. The MIRA Safety CM-6M Gas Mask head panel has a more rigid material.

    Although my military gas mask head panel is softer and more comfortable, the MIRA Safety head panel is far more durable in my opinion and still offers a good amount of comfort.

    I will note that the straps on the MIRA Safety CM-6M Gas Mask were very tough and difficult to pull at first but after a few times of using the mask they were easier to pull. My military gas mask straps are incredibly easy to pull and tighten, but it’s also much older.

    I do like how the MIRA Safety Gas Mask has these rubber tabs overtop of the strap hardware, where my military gas mask has these exposed.

    One thing that MIRA Safety could change with the back panel, and it’s a relatively easy fix, is to add a pull tab on the bottom of the mesh panel, similar to how my military gas mask is.

    Hydration System & Canteen

    Something that people may not think about while using CBRN equipment is the need to eat, drink, and use the toilet. I can tell you from personal experience that the things we do day to day without any hassle becomes far more difficult with a CBRN mask on and a full CBRN suit.

    Not only do you have to remove the mask to eat food or unzip the suit to have a bowel movement, but you then have to sanitize your exposed skin as it could then be contaminated by the chemical agents in the air.

    Because of all this, having the ability to drink water without removing your mask is amazing. The hydration system allows you to insert a small tube into the mask and into the lid of the canteen included with the CM-6M.

    On the MIRA Safety CM-6M Mask, the hose to insert into the canteen is located on the upper right side of the face shield. On my military gas mask, the hose is located on the bottom chin.

    One thing I liked about the MIRA Safety hose is that even if the hose came disconnected from the mask, it still had a covering over the insert. If the hose became disconnected from my military mask, then the insert would be completely exposed to the elements. Good design by MIRA Safety.

    I’ve done many drills with my standard military gas mask, and there’s no difference at all with the MIRA Safety CM-6M Gas Mask. Well, the only difference is that my mouth is the only mouth to have used this hydration system!

    The canteen included with the MIRA Safety CM-6M gas mask is identical to my military gas mask. On the twist-on cap there is a place for the insert on the mask to go into. This opening has a rubber protective covering that fits into the opening, so your water inside doesn’t get contaminated.

    Full Face Visor

    This is probably the biggest difference between the MIRA Safety CM-6M Gas Mask and my military gas mask! The field of view on the MIRA Safety is incredible with the full face visor.

    On my military gas mask, it has these two big circles to look through, which isn’t terrible, but it does limit the amount of how much you can see, which then limits your ability to perform any sort of tasks or drills. The MIRA Safety Gas Mask on the other hand makes it feel almost like you’re not even wearing a mask. The range of view is very wide.

    I would recommend buying visor protectors for the CM-6M. They’re about $50 and come with 3 PROFILM protectors. If your visor ever gets dirty or smudged, all you have to do is peel off the visor protector and apply a new one on and your visor is good as new.

    I’ll make note that when shooting, you’ll likely need to have risers so you can aim through your optics. On the firearms we use in the military, the sights were already pretty high, but using civilian firearms I’ve noticed that I could aim down the sight since the optics were mounted a bit lower.

    Functionality

    First thing to do in order to have a properly functioning gas mask… shave your face! If you have a beard, you’re not going to get that tight seal around your face.

    Donning on the MIRA Safety CM-6M Gas Mask is fairly simple. A tip is to have all the straps loose while you’re storing it. This way when you need to grab your gas mask and don it on quickly, you’re not having to loosen anything first.

    What I was taught in the military was to grab the mask with your left hand on the face of the mask. Turn it face down (your palm should be up).

    With your other hand, grab the bottom of the mesh backing. Then point your face down toward the ground above your mask.

    As you bring the mask up to your face, pull the bottom of the mesh backing over the back of your head. Then with the mask pressed against your face, begin pulling all the tabs on the right side of the mask, and switch hands when pulling the tabs on the left side of the mask.

    If you have a friend with you, definitely use the buddy system. One thing that just came to mind is when changing filters, it’s always a good idea to do each others filter changes. Having to unscrew a canister and place a new canister on while holding your breath can be stressful. And with added stress, you’re more likely to make a mistake or take longer.

    Conclusion

    The MIRA Safety CM-6M Tactical Gas Mask is a very reliable full face respirator to protect yourself from CBRN threats. In comparison to my military gas mask, the two are almost identical with minor differences, such as the drinking hose location, the mesh backing material and pull-tab, and the biggest difference being the CM-6M having a full visor, with the military gas mask having two eye openings.

    MIRA Safety gas masks are of the highest quality and trusted by many militaries of countries such as the United States, Turkey, Ukraine, Czech Republic, South Africa, and more.

    If you’re looking into obtaining a gas mask to protect yourself from CBRN threats, remember that you get what you pay for. Don’t risk saving a few dollars and buying a gas mask you’ve never heard of or on Amazon. Buy the equipment you know is going to work.

    Remember, having the best equipment out there doesn’t mean anything if you don’t get out there and practice. So get the gear, open it up, wear it, use it, practice with it, and get comfortable so that when things go crazy, you’re ready.

    Thanks for reading my review of the MIRA Safety CM-6M Tactical Gas Mask. I hope it’s been helpful and informative.

    The views expressed in this article are the personal views of myself and do not necessarily represent the views of the Department of National Defence.

  • PRIMUS Tactical Plate Carrier Review: Built for Tier 1 Operators

    PRIMUS Tactical Plate Carrier Review: Built for Tier 1 Operators

    The new PRIMUS plate carrier is an extremely modular and rugged plate carrier ideal for Emergency Response Teams or Special Forces personnel. The PRIMUS plate carrier is made by LORICA Equipment out in British Columbia, Canada, and is constructed using only high-quality materials with an innovative design.

    Being manufactured in Canada means that the PRIMUS tactical plate carrier could be primarily used by RCMP ERT or CANSOFCOM personnel such as CSOR Operators or JTF2 Assaulters.

    primus plate carrier

    The views expressed in this article are the personal views of myself and do not necessarily represent the views of the Department of National Defence.

    Specs

    • Durable laser cut laminated 500D/100D nylon construction
    • Removable Internal antimicrobial and moisture-wicking
      3D spacer mesh with A.M.Y.® and SORBTEK®
      Performance Yarns for temperature control
    • Padded and ventilated shoulders
    • Front and rear loop with dual side adjustments for maximum configuration
    • Quick-release shoulder attachments
    • Internal side pockets for mags or radios with bungee retention
    • Compatible with standard placard systems
    • Made in USA buckles
    • Front and rear ID patch loop
    • Durable and lightweight construction

    Pros

    • Rugged design
    • Lightweight
    • Laser Cut material
    • Padded interior and shoulders
    • Magazines fit snug
    • Made in Canada

    Cons

    • Nil

    Is LORICA Equipment worth the price?

    primus plate carrier

    At the time of this article, the LORICA Equipment plate carrier costs $498 CAD before taxes. LORICA is also offering a 15% discount for law enforcement, military, and first responders.

    If you have any questions or you want to buy the PRIMUS plate carrier, contact sales@loricaequipment.com or maxx@loricaequipment.com.

    Check out LORICA Equipment for tactical pouches and attachments!

    Everything that LORICA Equipment has to offer isn’t on their website at the time of this writing, as they are in the process of revamping it, so if you’re looking for something specific, reach out to Maxx using the email above.

    Plate Pockets

    primus plate carrier

    The plate pockets on the PRIMUS plate carrier are great, as the width and length can be adjusted by the Velcro tabs along the inside of the carrier. This allows you to configure the front and rear plate pockets to the exact dimensions of the plates you’re using.

    The plates I’m using in the PRIMUS plate carrier are the MIRA Tactical Level 4 Plates. If you want to read up on my full review on those then click here.

    On the inner side of the plate carrier are padded mesh material which offers a great deal of comfort and ventilation.

    The front and rear plate pockets on the PRIMUS plate carrier uses a laser-cut system oppose to the traditional MOLLE webbing. Going with laser-cut material reduced weight and also makes the plate carrier less bulky. I personally find it gives the PRIMUS a sleek look.

    Shoulder Straps

    primus plate carrier

    The shoulder straps on the PRIMUS plate carrier are fantastic. They have QR attachment points, and the one attached to the front panel aren’t sewn on, but Velcroed, which lets you adjust the height and angle of the attachment points.

    The shoulder straps also have a padded mesh material (similar to the inner portion of the plate carrier) which keeps the shoulders comfortable and offers good ventilation, too.

    Inside the padded shoulders are velcro tabs to allow for comms cables or hydration hoses to be routed through and secured.

    Cummerbund

    primus plate carrier

    The cummerbund on the PRIMUS plate carrier is very well designed. It attaches to the back of the carrier with Velcro, and they have a few inches of elastic material to give it a bit of stretch, allowing for a nice fit on the torso.

    It’s attached to the front of the PRIMUS using a QR system, but the QR hardware is adjustable on the front of the carrier using velcro, so you can lift the front placard panel and make minor adjustments.

    primus

    On the inner side near the front of the cummerbund is an internal pocket with an elastic band which can fit a 30 round 5.56 magazine or small hand radio.

    Laser-cut material allows for pouches to be attached, like the Double Pistol Mag Pouch and Dump Pouch.

    Kangaroo Placard

    The kangaroo placard is just a big open pocket with three bungee retention cords to keep your magazines secured. Inside the Kangaroo Placard I have the Triple Magazine Insert, but you can use a Single Magazine Insert or two, or perhaps a Pistol Magazine Insert, and then have another piece of kit inside the Kangaroo Placard.

    Triple Mag Insert

    I have my Triple Magazine Inserts inside the Kangaroo Placard which hold 5.56 magazines so snug that the bungee cords on the Placard aren’t even necessary. I’m still a fan of the bungee cords, and LORICA Equipment went with a plastic tab to pull the cords on and off. They’re large and easy to grab, making the great for working in low-light conditions.

    As mentioned earlier, LORICA Equipment also offers Single Magazine Inserts so you can really customize your loadout.

    Modular Task Pouch

    primus plate carrier

    The modular task pouch is great. There are two zippered compartments. The main compartment opens up a decent amount, and there’s an elastic cord inside that can reduce the amount that the pocket will open. In this compartment I personally carry some medical equipment like my Tourniquet, a Chest Seal, and Quick Clot. Stuff that I can quickly access to use on myself or someone else.

    The front zipper is a smaller compartment and can be used to carry a notepad & writing stick, admin notes, a small map & compass, or some recce snacks.

    IFAK Pouch

    primus plate carrier

    The IFAK Pouch (Individual First Aid Kit) comes in two pieces. The first piece is an exterior closure system with an elastic cord on top that can secure surgical scissors or a tourniquet. The second piece of the IFAK holds all the contents and has two large handles, one on either side, and this fits inside the closure system.

    The IFAK can hold a ton of medical supplies like Sterile Gauze, Quick Clot, a Torniquet, and more. The two handles on the sides are large enough to grab even when it’s on my back (as shown in the photo above).

    The First Aid Cross on the IFAK is fabric, but I would have liked it to have been made using IR reflective material so it could be easily seen at night with Night Vision Goggles.

    Pistol Mag Pouch

    primus plate carrier

    The Pistol Magazine Pouch holds two magazines and utilizes both the plastic insert (similar to the Triple Mag Insert) and the elastic retention cords with a nylon webbing pull-tabs. Even without the bungie cord on the pistol magazines, the plastic insert keeps the magazines snug and secure.

    GP Hanger Pouch

    primus plate carrier

    The General Purpose Hanger Pouch is something I’m finding more common on plate carrier setups. It’s almost like a trendy fanny pack. It attaches to the PRIMUS using velcro between the front of the panel and the kangaroo placard. It could also be attached on the back of the plate carrier.

    primus

    The single compartment on the GP Hanger Pouch holds a decent amount of kit and can be used to hold any miscellaneous items. I personally keep some bug repellent, sun screen, ibuprofen, ear plugs, a pair of gloves, and other little things that can be useful when on long missions.

    Zippers

    This is something that can easily be overlooked, but I really like the zippers (also known as Pull-Fasteners) because they’re minimal but also very high-quality and durable. The pull-tab on the zipper is rubberized with the LORICA Equipment logo.

    Final Verdict

    primus plate carrier

    Hands down the LORICA Equipment PRIMUS tactical plate carrier is the best plate carrier that I’ve used. The materials are high quality, the workmanship is exceptional, and the modularity and design is fantastic. Being able to insert body armour and snug the front and rear pockets tightly around the plates is something I haven’t seen before. And the ability to adjust the height and angle of the shoulder straps is an awesome feature.

    All of the pouches are made to the highest standard, and the padding both of the plate pockets and shoulder straps adds a great deal of ventilation and comfort for those longer missions.

    Again, if you’re looking for more information on the PRIMUS plate carrier, or you’re ready to purchase it now, then reach out to Maxx at maxx@loricaequipment.com.

    Thanks for reading my review on the LORICA Equipment PRIMUS tactical plate carrier. I hope it’s been helpful to you in making a decision on what plate carrier to buy, helping you to Live, Fight, and Move.

  • AKU Sentinel Mid GTX Boots Review

    AKU Sentinel Mid GTX Boots Review

    AKU is well-known for making some of the highest quality boots for Special Forces personnel. The AKU Sentinel boots are the latest model of AKU boots that are sure to be used by elite operators around the world. The Italian-made footwear are designed to be used in harsh environments to allow the user to perform at the highest level.

    In my military career I’ve worn numerous tactical boots, including GORUCK, Salomon, LOWA, and SWAT. But these are the first AKU boots that I’ve owned and worn, and I’ll be honest, from what I’ve heard from others, my expectations were high!

    Disclaimer: The views expressed in this article are the personal views of myself and do not necessarily represent the views of the Department of National Defence.

    Specs

    Weight: 560 grams per boot
    Lining: GORE-TEX® More Seasons
    Colors: Coyote, Black, Light Brown, or Dark Brown
    Height: 6″ (Mid Top) and 8″ (High Top)
    Footbed: Anti-Static OrthoLite Hybrid
    Upper: Rubberized Nylon with Protective Toe Rand
    Midsole: Injected Comfort EVA
    Outsole: AKU Tenuta Grip
    AR 670-1 Compliant: 8″ High Top – Coyote

    Pros

    Comfortable
    Waterproof
    Lightweight
    Durable
    Good traction
    Short break-in time

    Cons

    Laces are way too long
    Insoles could be better

    Price

    At the time of this article, the AKU Sentinel Mid GTX boots cost $280.

    Check out AKU Outdoor for the latest pricing!

    First Impressions & Fit

    I’m going to be completely honest here, as I always try to be when writing my reviews, but my first impression of the AKU Sentinel wasn’t good. I thought that they fit too loose for my liking. But I swapped out the insoles with the insoles from an old pair of GORUCK MACV-1 boots and it fixed the issue.

    Now since I’ve swapped out the insoles, these are one of the best pair of tactical boots that I’ve ever worn.

    Field Performance

    I’ve been wearing the AKU Sentinel boots daily for over a month now and can say for certain that they are one of the best All-Around boots that I’ve worn while serving in the military.

    The AKU Sentinel boots are lightweight, durable, supportive, and have excellent traction. I know that this is a boot that will be great to wear during warmer and colder months.

    Durability and Build Quality

    The build quality of the AKU Sentinel boots are to the highest standard.

    I’ve had small issues with other boot brands like GORUCK (cowhide problem which was solved by getting another pair of MACV boots) and a problem with the stitching on a pair of Salomon Jungle boots, which would be covered under warranty.

    But the AKU Sentinel boots have had zero issues when it comes to the build quality. AKU is known for making some durable boots and the AKU Sentinel boots are no exception.

    Comfort During Extended Wear

    At first I didn’t find that the AKU Sentinel boots were that comfortable. I found at first that my feet were moving around too much. But I swapped out the insoles for a pair from an old pair of GORUCK boots and it made a huge difference. So if that’s one change I would make of the AKU Sentinel boots it would be to get a more supportive insole. But that’s a very minor issue.

    Another problem was that I was experiencing some pain on the top of my left foot but realized I was tightening the speed lacing system too tightly. After I kept the bottom of the boot a bit looser and tightened closer to the top near my ankle, the pain went away.

    So after making those two corrective changes, the AKU Sentinel boots became one of the most comfortable tactical boots that I’ve ever worn while in the military.

    Traction & Stability

    The outsole of the AKU Sentinel is very aggressive and excellent for gripping some steep terrain. Given the depth of the grooves, these would also be very good for cold weather climates with a bit of snow on the ground.

    Because of the softer compound, these will also be relatively good on icy surfaces. I’ve worn some tactical boots with harder outsoles and walking on ice is nearly impossible!

    But as far as walking on soft or rocky terrain, these boots are fantastic.

    Breathability and Weather Protection

    So far I’ve not had any problems with my feet overheating, which adds a great deal of comfort for long durations. The Gore-Tex lining will also keep your feet nice and dry and wet environments. Keep in mind that if water gets in your boot, it’s not getting out!

    Weight and Mobility

    The AKU Sentinel boots are a light boot in my opinion, but it doesn’t crack my list of 7 Lightest Tactical Boots. Still though, for being a Gore-Tex boot, they only weigh around 1.25 pounds per boot!

    Speed Lacing

    This is one of the problems that I have with the AKU Sentinel boots, being that the laces are way too long!

    You might think that having a bit too much lacing isn’t a problem, but when you have to tuck the lacing in the pouch on the tongue of the boot, then you have this massive bulge that doesn’t look professional.

    To fix this problem, I loosened the release tab far enought that I could comfortably slide my foot in and out of the boot. Then I tied a knot, cut the excess lace, and burned the ends together. The result is a sufficiently length speed lace that doesn’t look awkward when tucked in the pouch.

    How to fix speed lacing on tactical boots

    aku sentinel boots
    Left: Modified. Right: Standard laces
    6.5 inches of speed lacing cut. Length is dependant on the wearer.
    Burn the cut ends
    Left: Cut speed lacing tucked in. Right: Standard speed lacing tucked in.

    As you can see in the photo above, the speed lacing that has been cut is barely noticeable in the pouch, whereas the standard lacing tucked in the pouch is very noticeable, bulges out, and doesn’t look professional.

    How the AKU Sentinel Boots Compare to Alternatives

    Two of my favourite pairs of tactical boots are the GORUCK MACV-2 boots and the Salomon XA Forces Mid boots. If those two boots had a baby, it would make the AKU Sentinel boots.

    The GORUCK MACV-2 boots are lighter, have very similar outsoles, but aren’t Gore-Tex.

    The Salomon XA Forces Mid are Gore-Tex, very durable, and have the speed lacing system, but sit lower around the ankles.

    Who Should Buy the AKU Sentinel Boots?

    The AKU Sentinel boots are ideal for military soldiers, special forces operators, law enforcement personnel, and your every day outdoor enthusiast. The rugged construction, breathability, and gore-tex lining will keep your feet protected, comfortable, and dry.

    If your organization requires a certain height of boot, make sure you purchase the right boot! The AKU Sentinel boots come in Low, Mid, and High.

    Conclusion

    Final thoughts on the AKU Sentinel boots is that these are one of my favourite tactical boots to wear while in uniform. They’re comfortable, lightweight, waterproof, and very well-built.

    My only constructive criticism is that the insole isn’t the greatest, as I had to swap mine out with a pair of insoles from my old GORUCK MACV-1 boots, and the speed lacing is way too long. I wonder if they just use the same speed lacing length for the Mid and High models of boots.

    Other than that, the AKU Sentinel boots are a fantastic tactical boot that will sure to be ranked among the best and most worn tactical boots.

  • Scorpion Optics Target Master Wildcat 6-24×50 Review

    Scorpion Optics Target Master Wildcat 6-24×50 Review

    The Scorpion Optics Target Master Wildcat is a well-built rifle scope with an illuminated reticle at an affordable price. With a magnification range of 6x to 24x, this scope offers the versatility to engage targets accurately at both short and long distances.

    The Target Master Wildcat is an affordable rifle scope that would be ideal for target shooting or hunting. The price is excellent for any entry level shooter who is looking to have a decent rifle build but doesn’t want to break the bank.

    I’ve been very impressed with the Scorpion Optics Target Master Wildcat, which at the time of this writing I have mounted on my Renova Action LSS Gen3. I’m also using the Scorpion Optics 30mm mounting rings, sunshade, and lens caps.

    Specs

    • Magnification: 6-24
    • Objective Lens Diameter: 50 mm
    • Reticle: Line-Tac
    • Turret Style: Exposed Multi-Turn Zero Stop
    • Tube Size: 30 mm
    • Adjustment Graduation: 1/4 MOA
    • Parallax Setting: 10 Yards to Infinity
    • Max Windage Adjustment: 70 MOA
    • Max Elevation Adjustment: 70 MOA
    • Travel Per Rotation: 15 MOA
    • Field of View at 100 Yards: 16.7 – 4.5
    • Eye Relief: 83-85 mm
    • Length: 13.22”
    • Weight: 29.6oz.
    • Battery: CR2032

    Pros

    • Excellent glass
    • Durable materials
    • Turrets feel solid
    • Illuminated reticle is crisp
    • Easy sight picture
    • Amazing warranty
    • Designed in Canada

    Cons

    • Made in Asia

    Price & Warranty

    At the time of this article, the Target Master Wildcat scope costs $599.95 which is very affordable for such a well-build and high performing optic.

    Check Scorpion Outdoors for the latest pricing.

    Scorpion Outdoors also has a Sting Free Warranty, which will cover any defects of the optic for its lifetime, and you don’t even need to provide a proof of purchase.

    Overview and Key Features

    The Scorpion Optics Target Master Wildcat is a well-built rifle scope at an affordable price that can be used to compete against optics worth thousands of dollars. One of the key features is the Zero-Stop which allows you to set your optic to your dialled in rifle, which allows you to quickly return to your zero which is ideal for competition shooting.

    Optical Performance and Clarity

    Target Master Wildcat 6x Zoom
    Target Master Wildcat 24x Zoom

    Clarity on the Scorpion Optics Target Master Wildcat is exceptional! My targets down range are super clear and the reticle is crisp.

    If you cheap out on a scope worth a few hundred bucks then you’re going to sacrifice on clarity when looking down range 100 yards or more. But there’s no need to spend thousands of dollars on a scope to get that crisp clarity!

    The left turret will adjust the focus and goes up to infinity, but I haven’t actually tested to see how far it will actually focus to.

    Buying a mid-price-range scope like the Scorpion Optics Target Master Wildcat is the best bang for your buck if you’re wanting an optic that will perform well without breaking the bank.

    Build Quality and Durability

    Very much impressed with the build quality of the Target Master Wildcat scope. When I looked at it online I wasn’t too sure how the build quality would be.

    But I wasn’t too worried since I’ve already used an LPVO made by Scorpion Optics and I was very pleased with the quality of that optic. If you’re looking for an LPVO then you can check out my review on the Scorpion Optics 1-4x LPVO here.

    Reticle and Illumination

    One of the nice things about the Scorpion Optics Target Master Wildcat is that it features an illuminated reticle with 11 increments of brightness. The illumination is crisp and doesn’t distort or blend with the targets, allowing you to continue making accurate shots.

    This particular model of the Target Master Wildcat uses an FFP reticle which stands for Forward Focal Point, basically meaning that when I zoom in on the target, the reticle will also get larger. This is ideal for long-range shooting so that you can account for windage or leading a moving target.

    On the reticle itself it has numbers on the horizontal line and on the lower portion of the vertical line. The numbers correlate to inches at 100 yards (I think) and are fairly accurate. The lines from 0 to 10 are in increments of 1 inch, and after that each line is 2 inches apart.

    Ease of Use and Adjustments

    If you’re new to shooting, then the amount of dials and accessories on a scope can be intimidating, but one you know where everything is and how it works it’s very straight forward.

    The turrets on the scope all feel solid and have a nice click when adjusting. This is awesome for when you’ve just taken your shot, your eyes are still downrange, and you need to make that slight adjustment of 1/2 MOA or so. You don’t need to carefully look to see how much you’re turning the turret, but can simply feel and listen for the clicks.

    The 1/4 MOA increments are perfect as it allows for accurate shot placement especially at longer distances.

    Magnification Range and Versatility

    When selecting an optic one of the biggest factors is the magnification range. How much is it zoomed in at the minimum range, and how much does it zoom in at the maximum limit?

    For those looking to shoot at a minimum of 100 yards (target shooting, hunting) then a 6-24x magnification range is great. This allows for you to hit targets at 100 yards no problem and even attempt to hit targets up to 600-800 yards.

    What Other People Are Saying

    TimboPRS left a review on Scorpion Outdoor’s website about this specific optic, and this is what was said:

    Image by TimboPRS

    “I’ve been shooting one of these since last year. I switched to it after shooting another very popular brand scope that is comparably price. I won’t be going back. I love it. It’s clearer, brighter, a more forgiving eye box, a nicer reticle for the shooting I do, and it’s also light and comes with a zero stop. My old optic had neither of those features and lists for about $50 more than my Wildcat. I’m done with picking products because of the name on them or by the reputation a company used to have or earned in the past. I’m looking forward to getting my hands on the new Telson Wildcat (owned by Scorpion Outdoors). If it plays above its price point the way this scope does, it’s going to be as big a winner as this one, and most likely bigger.”

    Conclusion

    I’ve been incredibly happy with the Scorpion Outdoors Target Master Wildcat scope. As I said, I was wondering how solid it would be from the photos on the website, and I was not disappointed. When I held it in my hand I thought “this is solid!” So if you’re looking for an affordable optic with good range and great durability backed up by an amazing warranty, you’ll be happy with the Target Master Wildcat.

  • Fenix PD32R Review: A Compact & Robust Tactical Flashlight

    Fenix PD32R Review: A Compact & Robust Tactical Flashlight

    The Fenix PD32R is a compact tactical rechargeable flashlight with a decent output of 1400 lumens and a throw of nearly 350 meters. It’s a very well-made tactical flashlight and even comes with a holster to carry it around in. Fenix Lighting also offers a ton of firearm attachment accessories so you can mount it on the end of your AR-15 if that’s what you’re looking for.

    Fenix Lighting makes some seriously tough flashlights with excellent output and range, as well as lengthy battery life. I’ve always been impressed when I open the box and hold a Fenix Lighting flashlight in my hand. You know it’s made solid by the weight of it. If you need a durable tactical flashlight that will last, Fenix Lighting is definitely worth it.

    Specs

    • Max Runtime: 70 hrs
    • Max Output: 1400 lumens
    • Beam Throw: 344m (1,129 feet)
    • Candela: 29,588cd
    • Charger: Built-in USB-C
    • Length: 5.32 inches
    • Weight: 4.8 oz (including battery)
    • LED: LUMINUS SFT40
    • Tactical Strobe
    • Lighting Modes: Low/Mid/High/Turbo
    • Nylon Belt Holster included
    • USB C cable included
    • Battery: 18650 lithium-ion 5000mAh (included)
    • Waterproof: IP68 up to 2m

    Pros

    Affordable
    Good Quality
    Decent Throw
    High Lumens
    Holster Included
    Waterproof
    Dustproof

    Cons

    No S.O.S. Mode

    Price

    At the time of this article, the Fenix PD32R costs around $106 but I’ve seen this flashlight go on sale often on the US Store.

    Check out Fenix Lighting for the latest pricing! Use my link and get 10% off your order. (Discount code AFTACGEARGUY)

    Also, don’t buy from Amazon! These sales are made to Asia. Instead, buy from the US Store (use my link above) and support your economy!

    Beam Shot Comparison

    Below are some images to compare how bright and intense the output of the Fenix PD32R is compared to the Wuben T1.

    Fenix PD32R (1400 Lumens @ 29,588cd)
    WUBEN T1 (2000 Lumens @ 62,013cd)

    The Wuben T1 (full review here) has an output of nearly double the PD32R, but you can see how well the PD32R still lights up an area in close proximity.

    Performance

    The Fenix PD32R performs very well over extended periods of time. I’ve been using this flashlight for nearly a year now and I’ve been impressed with its performance. The battery life on it lasts a long time too, which is awesome especially when going on long hikes or doing night shooting when you might be able to charge it.

    The High Outputs are INCREDIBLY bright too, which is ideal for use in tactical scenarios.

    Modes

    There are 4 brightness levels on the Fenix PD32R tactical flashlight and a Strobe Mode.

    What I really like is how everything is done by the tail switch. Press the tail switch all the way to activate the flashlight, then simply tapping the tail switch button will cycle through the different output levels. Holding down the tail switch will initiate the Stobe Mode.

    Another thing about the tail switch is that it’s silent, meaning there isn’t any more of that clicking noise whenever it’s turned off and on. This is an excellent feature for when the user is in a tactical scenario.

    The Fenix PD32R does have a memory, meaning that it will remain in whatever brightness output it was in when the flashlight was turned off. So make sure you’re not staring into the flashlight when you turn it on, or else you could get 1400 lumens to your eyes.

    It would be nice to have an S.O.S. Mode on the flashlight, perhaps by triple tapping the tail switch, but this is the only negative thing I had to say about the flashlight.

    Build Quality

    The Fenix PD32R is a very well built tactical flashlight. Everything about it has been done well. It has a decent weight to it which tells you that its a solid flashlight. The machining is awesome, no sharp edges, and the threading to access the USB-C port is perfect.

    USB-C Charging

    If you didn’t know this already, the Fenix PD32R tactical flashlight is rechargeable! To charge the flashlight, you need to access the charging port on the side of the flashlight. This cover of the charging port is waterproof and dustproof.

    It used a USB-C charging port and cable, which is far better than the micro-USB cables that some other flashlights use. The USB-C cable and port is very rugged and durable compared to the smaller micro-USB.

    Charge Level Indicator

    Next to the USB-C charging port is the charge indicator. It also acts as the battery life indicator as soon as you turn on the flashlight.

    Accessories

    The Fenix PD32R comes with a holster which is made pretty decently.

    It also has a clip which can be removed if you would like. Because of the size of the Fenix PD32R, I’m able to slide the flashlight into my knife pocket on my tactical pants and have it hooked.

    There’s also a lanyard with the Fenix PD32R which is a pretty decent lanyard. It has a tiny cord that loops through the tail end of the flashlight.

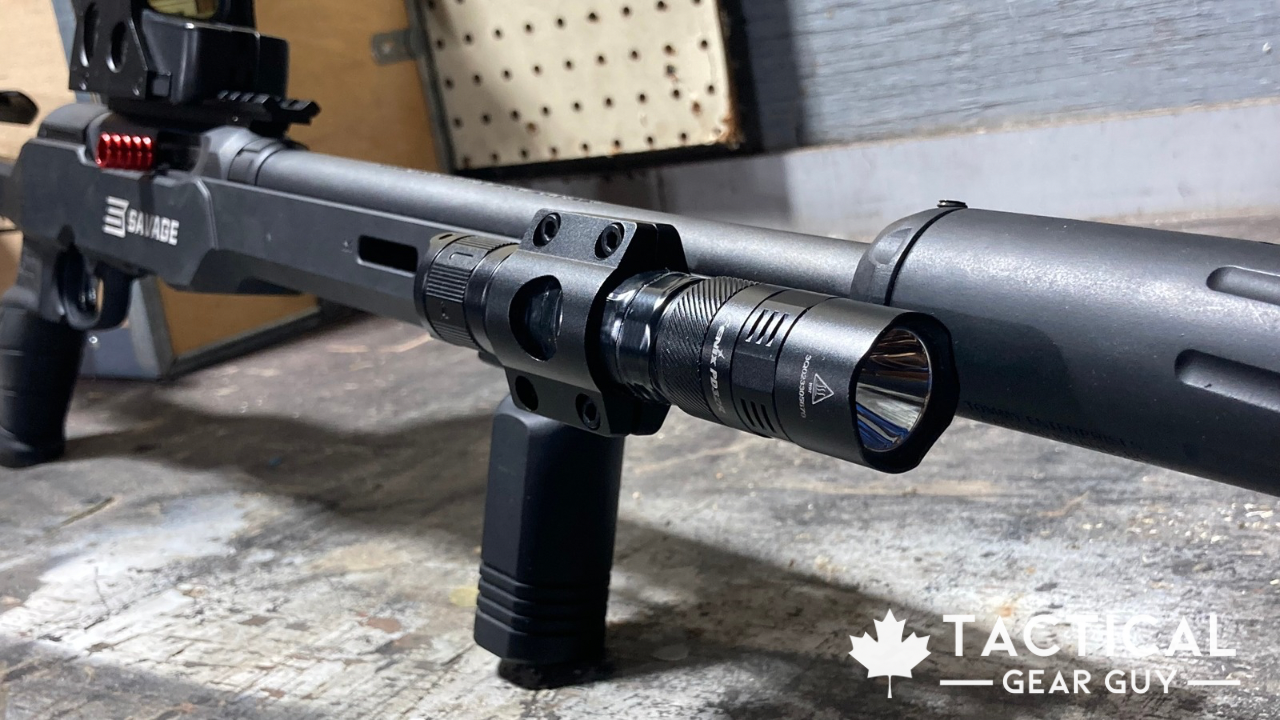
    Available for the Fenix PD32R are weapon mounting accessories for you to attach it on either your M-LOK or Picatinny hand guard. Be sure to check if the accessories are compatible with your flashlight though. Not all mounts work with the same flashlight.

    Conclusion

    The Fenix PD32R is a very robust tactical flashlight. It’s affordable at around $100, durable, solid, and performs exceptionally well with an output of 1400 lumens and a throw of 344 meters.

    I’ve been very happy with this handy tactical flashlight and the versatility it offers. Thanks for reading my review and be sure to use my link and get 10% with discount code AFTACGEARGUY.

  • GORUCK Rucker Review After 5 Years of Military Use: Is It Still Worth It?

    GORUCK Rucker Review After 5 Years of Military Use: Is It Still Worth It?

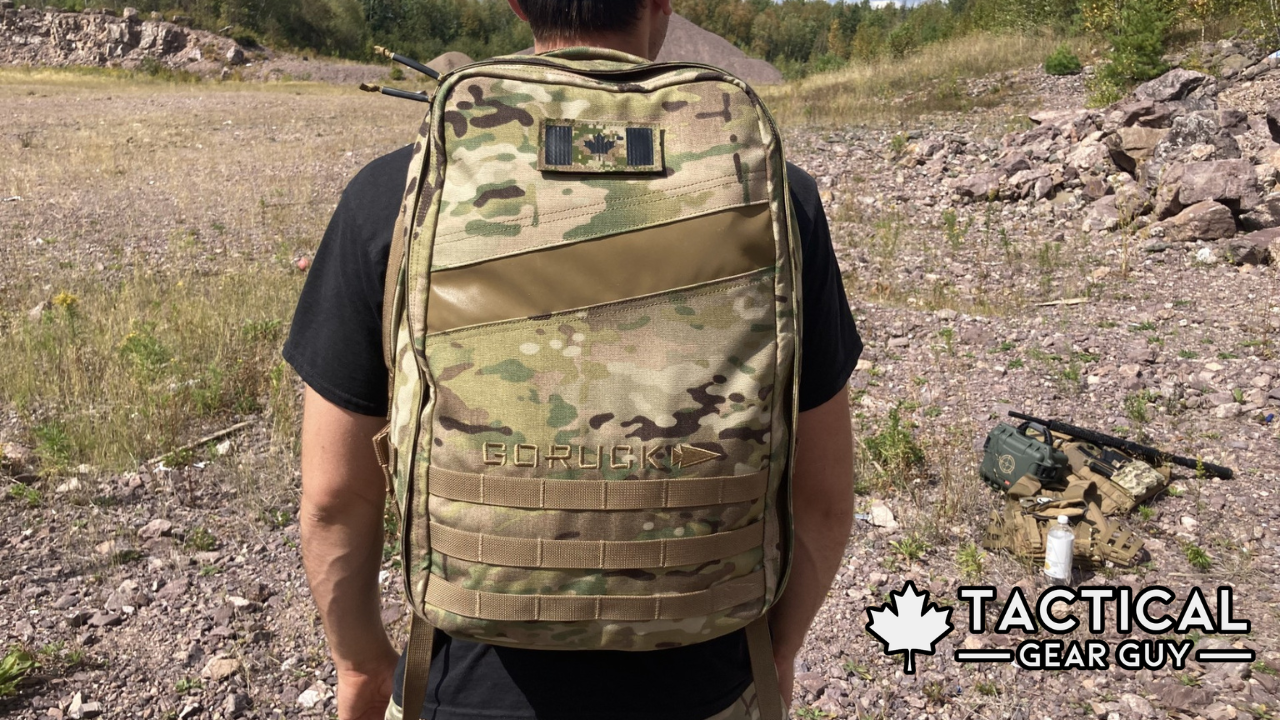
    The GORUCK Rucker 4.0 is the toughest backpack for rucking on the planet. It’s built to Special Forces standards from ultra-durable 1000D Cordura with a single heavy-duty zipper for the main compartment. The GORUCK Rucker 4.0 is incredibly well-built and is designed for training hard. Handles on the top, bottom, and sides allow you to maneuver it in so many ways to get the most out of your training sessions. And the reflective strip on the front of the pack keeps you visible to traffic driving by in low-light conditions (like those 5am ruck marches!!).

    goruck rucker 4.0

    Specs

    • Primary Material: 1000D Cordura
    • Back Panel Material: 210D High Tenacity
    • Shoulder Strap Material: 210D High Tenacity
    • Elevated Ruck Plate Pockets
    • Velcro Internal Pockets
    • Relfective Stripe
    • Included Sternum Strap
    • MOLLE for accessories

    Pros

    • Tough, Rugged, & Durable
    • Water-resistant (rainproof)
    • Best pack for rucking
    • Best warranty on the Planet
    • Can Hold 75 lbs from Ruck Plates Alone

    Cons

    • Nil

    Price

    At the time of this article, the Rucker 4.0 costs around $265, but depends on the size and sometimes the colour pattern you want.

    Check GORUCK for the latest pricing!

    I listed the price as a “Con” in this review, but although it’s expensive, it’s worth it. You’re buying an item meant to last a lifetime and if you use it, it will benefit your physical and mental health so much! This is an investment.

    Design & Build Quality

    goruck rucker 4.0

    The GORUCK Rucker 4.0 built extremely well and is meant to take a beating! It’s constructed from ultra-durable CORDURA nylon, either 1000D or 500D depending on colour.

    Features padded shoulder straps and multiple grab handles (top, sides, and bottom) for versatile carrying options. These handles are excellent for doing different exercises, like fireman carries, over-head squats, or bent over rows. The possibilities are endless! … maybe not endless, but there’s too many to come up with here.

    Elevated ruck plate pockets keep weight high and close to the back for better stability. There are two ruck plate pockets in the Rucker 4.0 allowing you to carry up to 75lbs of weight from Ruck Plates alone!

    Built to military-grade standards with exceptional stitching and attention to detail. The Rucker 4.0 is built to last! GORUCK’s warranty is probably the best warranty on the planet. If it breaks, they’ll fix it or replace it.

    Capacity & Size Options

    goruck rucker 4.0

    The GORUCK Rucker 4.0 is available in 15 L, 20 L, and 25 L sizes. Depending on your height, you’ll want to select a size that is suited for you.

    I’m 5’10” using the 25L and it does feel a bit large on my back, where my wife’s 20L Rucker fits nicely. So if you’re 6′ tall or more, then the 25L would be a safe bet. Any shorter than 6′ then I would stick to the 20L

    Each model features well-thought-out internal organization with separate weight plate compartments. The Main Weight Pocket can hold the 45 lb Ruck Plate, and the 2nd Weight Pocket can hold the 30 lb Ruck Plate, a total of 75 lbs!

    Comfort & Carrying Experience

    goruck rucker 4.0

    The GORUCK Rucker 4.0 has an enhanced lumbar support with 10 mm EVA foam padding at the lower back area. Having this support on your lower back is such a game-changer for those long heavy rucks. I don’t know how many times I’d ruck with my military-issued rucksack and the chafing on the lower back was so painful. Thankfully, GORUCK has incorporated the lumbar support to prevent this from happening.

    You can also purchase the padded hip belt which is phenomenal for those long heavy ruck marches. I highly recommend investing in the hip-belt as this will greatly help relieve the stress on your shoulders. What I do is I tighten the shoulder straps so the Rucker 4.0 is sitting nice and high on my back, then I tighten up the hip-belt, and then loosen the shoulder straps ever so slightly.

    goruck rucker 4.0

    The shoulder straps are lined with smoother 210D material to prevent chafing and has webbing so you can attach the adjustable sternum strap, which is included with the Rucker 4.0, helping keep the Rucker stable on the back.

    Once you have the Rucker 4.0 setup and positioned on your back, it makes for one comfortable (or as comfortable as it can be) ruck march. Essentially, it’s making it difficult for good reasons, and not for bad reasons which cause injuries or serious chafing. Enjoy the suck!

    Load & Ruck Plate Compatibility

    goruck rucker 4.0

    The GORUCK Rucker 4.0 is purpose-built for weighted rucking and fitness training. As they say on their website, it’s a gym on your back. You can go for a lengthy ruck march, then take the pack off and do some overhead squats while holding the two side handles, or flutter kicks with the Rucker 4.0 held up, there are so many possibilities.

    The elevated plate pockets keep the load from shifting mid-march. They’re secured using a velcro closure keeping the plates nice and snug.

    The 20 L and 25 L versions accommodate up to a 45 lb plate, while the 15 L handles up to a 30 lb plate.

    goruck rucker 4.0

    Dual plate pockets (in the larger models) allow stacking weights for progressive overload. As I said earlier, the 20L and 25L Rucker 4.0 can hold both a 30 lb and 45 lb Ruck Plate simultaneously. That’s 75 lbs of weight!

    External MOLLE webbing supports optional hip belts or additional gear attachments. I can’t recommend the padded hip-belt enough! It will help a ton with relieving strain on your shoulders and also keep your Rucker 4.0 from swaying left to right, especially when running.

    Features & Practical Details

    goruck rucker 4.0

    There are three rows of MOLLE webbing on the front and sides for customization and accessory attachment.

    Drain holes at the bottom allow water to escape during wet training or rainy conditions. Remember this for when you use the Rucker 4.0 just as a daily use backpack with valuables inside.

    Reflective stripe enhances visibility for early-morning or nighttime rucks. Too often I’ve been driving on base and it’s so difficult to see anyone if they’re not wearing a reflective band. The fact that GORUCK incorporated a large reflective stripe on the Rucker 4.0 is a great design feature. My wife has the older 2.0 version and it doesn’t have this. So good job to GORUCK for adding it to the 4.0 variant.

    Hook-and-loop Velcro patch panel for identification or morale patches. Not much else to say about that.

    Durability & Daily Use

    goruck rucker 4.0

    The GORUCK Rucker 4.0 is built to Special Forces standards. I’ve owned three GORUCK packs now, as well as the GORUCK Kit Bag, and I can honestly say that GORUCK makes the most durable and rugged gear.

    GORUCK is so confident in their gear lasting for decades (even centuries?) that they have a Scars Lifetime Warranty. Basically if your gear is broken in ANY way, they will either fix it or replace it. This isn’t including footwear though, since footwear will fail eventually after continuous use.

    The GORUCK Rucker 4.0 is designed to take a beating. The older versions of the Rucker used to have an external zipper and two internal zippers, but those kept getting smashed up from people throwing the Rucker on the ground during a workout session, so GORUCK replaced the external zipper for a reflective panel, and replaced the two internal zippers for velcro.

    goruck rucker 4.0

    The 1000D Cordura material is extremely durable and abrasive resistant, as it’s similar to the material used for kit bags by Special Forces units around the world.

    I’ve also used the GORUCK Rucker 4.0 as an Everyday Carry bag since I own the MultiCam pattern and can wear it while in uniform. I don’t recommend using this as a Field Kit bag though, because of the big reflective band on the front of the bag. Not great for tactical environments.

    Value & Final Thoughts

    The GORUCK Rucker is a very durable backpack designed to take a beating. It’s made from rugged 1000 Denier CORDURA in many different colour patterns. Made to the standards required for Special Forces operations, the Rucker 4.0 will not fail.

    Not only is the GORUCK Rucker 4.0 an incredible tool to have for training and will last a lifetime, it’s covered by GORUCK’s SCARS Lifetime Warranty, so if anything breaks at any time in the future, you know it’ll be fixed or replaced.

    goruck rucker 4.0

    I highly recommend getting some Ruck Plates to insert into the Rucker 4.0 and the padded hip belt to make those loaded ruck marches as comfortable as possible.

    Make sure you also check which size is best for your height. You might not think this matters, but it does. If you’re only 5’9″ but want to get the 25L to fit more stuff, it might feel awkward on your back and not sit properly. So get the right size.

    Although this is a pricey item to buy, I would consider this an investment for your health, and you’re only going to have to buy it once.

  • Savage Arms A22 Precision Review: The Best .22 LR for Tactical Shooters?

    Savage Arms A22 Precision Review: The Best .22 LR for Tactical Shooters?

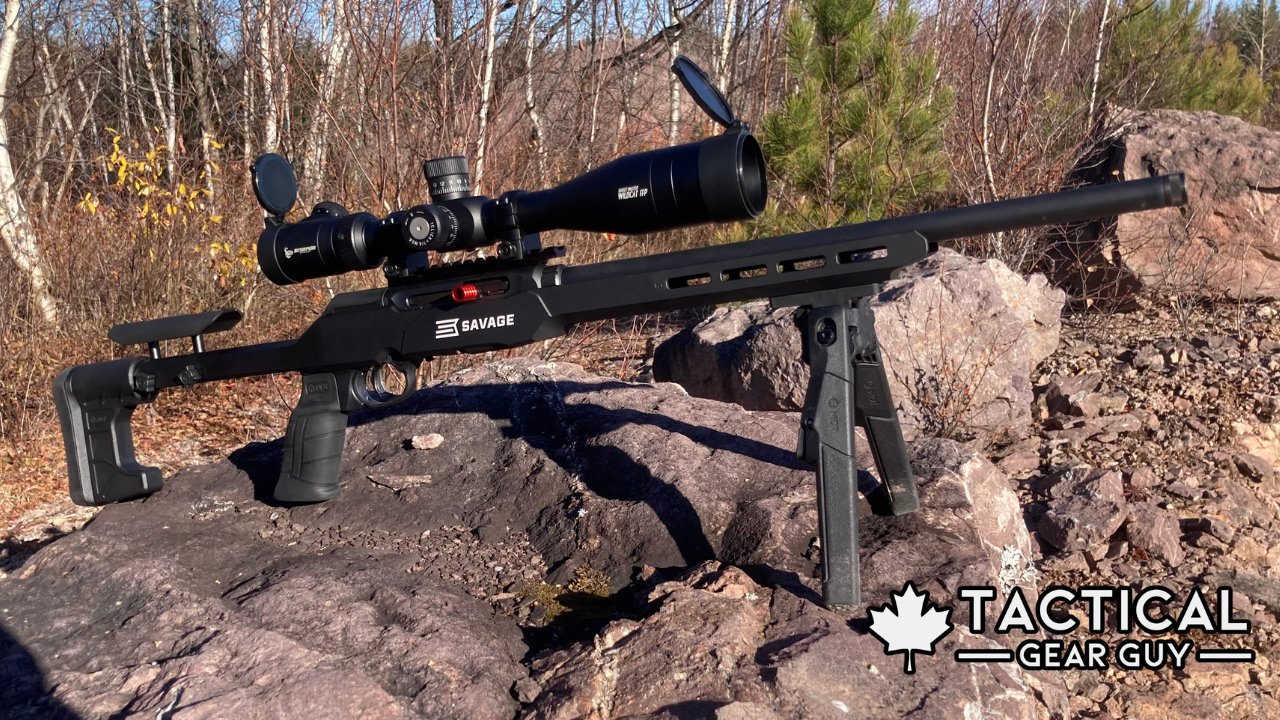
    The Savage Arms A22 Precision is a robust and accurate .22LR semi-automatic rifle for anyone looking to better their marksmanship or enter the Rimfire Competition world. It features the Savage Arms AccuTrigger and Canadian-Made one-piece MDT Chassis with an adjustable length of pull and cheek rise.

    With the Liberal government banning mostly every centerfire semi-automatic rifle in Canada, law-abiding Canadian sports shooters are now forced to find an alternative. Either by purchasing a centerfire rifle with a different action – such as lever action or pump action – or buy a semi-automatic rimfire rifle.

    a22 precision

    Specs

    • • Custom 1 piece MDT aluminum fully adjustable stock
      • 18” threaded heavy barrel with flush cap
      • 1 piece Picatinny rail
      • Adjustable AccuTrigger
      • Oversized Charging Handle
      • 10 round rotary magazine

    Pros

    Good accuracy for .22LR
    AccuTrigger is adjustable
    Solid chassis by MDT
    Adjustable length of pull and cheek rise
    Great training rifle for precision shooters

    Cons

    Magazine occasionally tricky to load/unload
    Magazine release is on magazine itself, oppose to the chassis

    Price and Value for Money

    Typically priced around $500–$650 USD, depending on configuration. Savage Arms has the standard A22 Precision as well as a Lite version which will cost a couple hundred dollars more.

    If you’re in the precision shooting world and you want to hone-in on your marksmanship skills without breaking the bank, then having an option like the A22 Precision is excellent as you can get .22LR ammunition for around $0.10 – $0.20 per round! This will allow you to fire a ton of ammo.

    Also, having the A22 Precision will allow you to enter into some Rimfire Competitions, so there are multiple benefits to having a solid 22LR rimfire rifle.

    The A22 Precision is also competitively priced with the Ruger Precision Rimfire 22LR, another well-known precision rimfire rifle.

    Design and Build Quality

    a22 precision

    The A22 Precision rimfire rifle is solid! It features a specifically design chassis made by MDT, a premium manufacturer for firearm chassis in the competitive sports shooting world. Savage Arms also equipped the A22 Precision with MDT’s high-quality Elite Pistol Grip. A nice addition when they could have justified a cheaper pistol grip, but went with a nicer one anyways.

    The entire rifle has a matte black finish giving it that tacticool modern look. I’m a big fan of the MLOK slots on the side and bottom of the forend. I would have liked a full-length picatinny rail along the top, but that would just add weight when a full-length rail isn’t necessary.

    The overall look and feel of the rifle is incredible. High quality machining and no random tool marks or rough edges.

    Barrel and Receiver

    a22 precision

    The A22 Precision comes with an 18″ threaded heavy barrel with a flush cap. If you go with the A22 Precision Lite variant, that model has a carbon fiber wrapped barrel. The benefit of having a heavy barrel is increased accuracy.

    The threads on the barrel are 1/2 inch 28 Threads Per Inch (TPI) which allows you to attach a muzzle device, a suppressor for you Americans, or if you’re in Canada like me a Fake Suppressor. This Faux Suppressor was made by Tommy Enterprise out in British Columbia, so if you’re in Canada and looking for a tacticool look, go check him out.

    Trigger and Controls

    a22 precision

    The A22 Precision is equipped with an AccuTrigger which I’m a big fan of. It has the ability to be adjusted to increase or decrease the pull-weight of the trigger. The silver tab on the trigger will press into the actual trigger as you pull your finger, then you get a bit of resistance before the shot is released.

    Nothing fancy about the safety selector. Just toggles from side to side but I do like this style of safety for a semi-automatic rimfire rifle.

    Stock and Ergonomics

    a22 precision

    The buttstock on the A22 Precision has an adjustable length of pull which can be set by removing or adding spacers. The buttpad is very comfortable and maybe a bit unnecessary for a 22LR but I’m not complaining!

    There’s also an adjustable cheek riser which can be adjusted and set by loosening two screw fasteners on the buttstock. I really like how MDT went with this style of cheek riser oppose to needing a tool to loosen and adjust the height. Great design.

    a22 precision

    Because of the MDT chassis, the barrel on the A22 Precision is free floating meaning the forend of the chassis isn’t contacting the barrel at all. This removes any interference of the barrel making it as accurate as possible.

    The charging hand is a great size in my opinion and easy to find. Because it’s on the right hand side (and I’m right handed) I had to do an “AK style” rechambering, which to be honest is kind of fun… get a couple of Butler Creek 25-round magazines and you have the full experience!

    Accuracy and Performance on the Range

    a22 precision

    During my accuracy test of the A22 Precision, I set my station up around 50 meters away (going by my friend’s GPS watch). The ammunition I was using for this test was Federal Automatch 40-grain, Remington Thunderbolt High-Velocity 40-grain, and Browning BPR 37-grain.

    Group Sizing (Round 1)

    Here is the 10-round group sizing for each type of ammunition:
    – Federal Automatch 2.96
    – Remington Thunderbolt 1.85
    – Browning BPR 3.10

    Although the Browning scored the worst of the three, it looked like my rounds were consistently hitting one area, whereas the Federal was all over the place. So, I decided to shoot another 10-round group with the Remington & Browning ammunition.

    Group Sizing (Round 2)

    Here’s another 10-round group size for the following ammunition:
    – Remington Thunderbolt 3.15 (1.95 if I removed 1 shot)
    – Browning BPR 4.40 (1.90 if I removed 2 shots)

    After looking at these group sizes, if I removed one or two of the shots and made this an 8-round grouping, it drastically improves the group size. Another thing I noticed again was the consistency of where most of the rounds were impacting.

    During this accuracy test there was a slight breeze which could have affected my shot placement. I’d be curious to see what the grouping would have been with no wind outside or at an indoor range.

    Magazine and Ammunition Compatibility

    a22 precision

    The A22 Precision comes with a single 10-round rotary magazine, and this is where I started running into some problems. I found it somewhat tricky to load the 22LR rounds into the magazine. The best way I found was to push on the round already inserted with the back of another 22LR round, then as you push the first round over you pivot and slide the next 22LR round in the magazine. I found this sort of a hassle especially with gloves on in below-zero Celsius temperature.

    Another thing about the magazine I had a problem with was the magazine release, which is on the actual magazine itself and not the chassis. There were times where I found it very difficult to remove the magazine from the chassis. And if the magazine release somehow breaks or gets worn out, then you have to go out and buy another magazine.

    As far as feeding rounds, at first I did experience some stoppages and failures to extract, but as I fired off 100 rounds or more, the stoppages decreased and I could fire 10 rounds and 25 rounds without any hiccups.

    The ammunition I was firing was Federal, Remington, and Browning. It definitely preferred the Remington High-Powered ammunition for both accuracy and effectiveness.

    Optics and Accessory Mounting Options

    a22 precision

    The A22 Precision comes with a 0 MOA picatinny rail. There may be some folks out there that would prefer a 20 MOA rail in order to get some further target shooting out of this rifle, but I’m sure that’s an easy fix from Savage Arms.

    The A22 Precision comes with a swivel mount on the lower end of the forend for mounting a traditional bipod. I removed this swivel mount and attached my MDT ORYX bipod. I’ve also used my MLOK Vertical Grip made by Tommy Enterprises when I’m wanting a tacticool rifle setup.

    The MLOK rail is great for being able to attach other accessories. After I completed the accuracy test, I put on my Fenix PD32R tactical flashlight.

    Final Verdict

    Overall, I have to say that I’ve been very happy with the Savage Arms A22 Precision. I’m really happy how I can take this out and practice my marksmanship skills and get some relatively good grouping sizes (for a 22LR that is) but I also like how I’m able to swap out the bits and pieces and have a tacticool setup.

    Of course, there are some more cost-effective options when it comes to 22LR semi-automatic rifles, but if you’re looking for something that will allow you to get some accurate groupings then I would highly recommend getting the A22 Precision. If accuracy isn’t a priority for you, then you’ll probably be content with something else.

    I hope this review was helpful to you! Thanks for reading and supporting the blog. Cheers.

  • 5.11 vs Condor Plate Carrier: Which Tactical Vest Is Worth Your Money?

    5.11 vs Condor Plate Carrier: Which Tactical Vest Is Worth Your Money?

    If you’re looking for a durable, well-build, and affordable plate carrier, then you’ve likely come across brands like 5.11 Tactical or Condor. Both of these companies have been around for years and are known to make some decent tactical gear that is made well and budget friendly. I’ve personally owned and used both 5.11 and Condor gear and have been very satisfied with them.

    5.11 Tactical and Condor have a plate carrier system that utilizes a quick-release system which is excellent for getting a plate carrier off quickly in an emergency. The 5.11 quick release system is called the QR Plate Carrier, and the Condor quick release system is called the RS Plate Carrier.

    As I said, I’ve been very pleased with both, and while they each use a quick-release system, the two carriers are built very differently. Hopefully this article helps you determine which is best for you.

    Condor cyclone rs review

    5.11 Plate Carrier Pros & Cons

    Pros

    Budget-friendly
    Lightweight
    Laser Cut
    Padded Shoulders
    Inner Padding
    Durable Materials

    Cons

    Not the best QR system

    Condor Plate Carrier: Pros & Cons

    Pros

    Affordable
    Comfortable
    Quality Build
    Form Fitting
    Quick Release System
    Made In USA

    Cons

    No inner padding

    Price Comparison: Value for Money

    BrandPlate CarrierPrice
    5.11 TacticalQR Plate Carrier$210.95 (Black or Coyote)
    $230.95 (MultiCam)
    Condor OutdoorCyclone RS Plate Carrier$220.00 (Ranger/Black/Kangaroo)

    Both the 5.11 QR plate carrier and the Condor RS plate carrier are competitively priced at around $210-230. If you need something less expensive, Condor has a ton of other plate carrier options between $100 – $180.

    Discount code for Condor gear

    Use my discount code on your Condor order TGG15 and get 15% off your entire order.

    Build Quality and Materials

    Both the 5.11 Plate Carrier and Condor Plate Carrier are well-built with durable materials and excellent stitching. I’ve had no issues with the quality of the build.

    The 5.11 QR Plate Carrier uses laser-cut system and I was pretty rough on it to get some of the attachments through the slots, and it held up very well. I would say that this carrier is a bit more rigid than the Condor plate carrier.

    The Condor RS Plate Carrier is made in the USA, and it shows. The stitching was excellent, and the 500D Cordura is both durable and comfortable.

    Comfort and Fit

    Condor cyclone rs review

    How comfortable is the 5.11 plate carrier?

    The 5.11 QR Plate Carrier is definitely more of a rigid carrier system compared to the Condor Plate Carrier. The 5.11 cummerbund has very little stretch to it. That said, I didn’t have any problems with comfort when it came to the cummerbund. The shoulder straps are padded, which offers a great deal of comfort for those long days in the field or in training exercises.

    How comfortable is the Condor plate carrier?

    The Condor Plate Carrier used an elastic cord which allows the cummerbund to stretch and form around the user.

    MOLLE and Attachment Options

    5.11 plate carrier review

    This is a close matchup between 5.11 and Condor. Both companies offer a ton of attachment options for their plate carrier systems, such as magazine pouches, or admin pouches, and more. I would say that Condor has more selection when it comes to their accessory attachments, including a 6-magazine pouch.

    Keep in mind that the Condor RS Plate Carrier doesn’t come with the padded shoulder straps, so if you want that added comfort (I highly recommend it) then you’ll have to add those to your order.

    Durability in the Field

    Condor cyclone rs review

    How durable is the 5.11 plate carrier?

    The 5.11 QR plate carrier is extremely durable. At first, I was worried about the shoulder straps break, but there’s been no issues with them. Even the laser cut material is incredibly strong. I was so rough on the carrier when putting the magazine and admin pouch on that I thought I was going to rip the material, but it held up.

    How durable is the Condor plate carrier?

    The Condor RS plate carrier is well-built (made in USA) and there’s been no sign of damage from my time using it. If you’re using the Condor plate carrier on an occasional basis, say once a week or month, then this will last you for a very long time.

    What size plates will they take?

    condor cyclone rs plate carrier
    BrandPlate CarrierPlate Size
    5.11 TacticalQR Plate Carrier– Small to Medium SAPI/ESAPI Plates, 10″ x 12″ Plates (S/M)
    – Large to Extra Large SAPI/ESAPI Plates (L/XL)
    Condor OutdoorCyclone RS Plate Carrier10.25″ x 13.25″

    I had the 5.11 QR plate carrier in size Small/Medium, and the 10″x12″plates did fit, but it was super tight. Unless you’re above 6’2″, I don’t recommend getting the Large/XL size of the 5.11 QR plate carrier. I’m 5’10” and the Small/Medium fit perfect.

    The Condor RS plate carrier on the other hand fit my 10″x12″ plates no problem.

    If you’re looking for some decent Level IV plates, check out my review of the MIRA Safety Level IV plates here.

    Should you buy the 5.11 plate carrier or the Condor plate carrier?

    Condor cyclone rs review

    After wearing both of these carrier systems my preference of the two was the Condor plate carrier. Although the 5.11 QR plate carrier was still very well build, durable, and felt comfortable, I enjoyed the Quick Release system on the Condor RS plate carrier, and I found the traditional MOLLE webbing easier to work with than the laser cut system on the 5.11 QR plate carrier.

    So really, it all comes down to personal preference. Both carriers were very well-build, tough, durable, modular, and affordable.

    Thanks for reading this article on the 5.11 plate carrier vs Condor plate carrier. I hope it’s been helpful to you in making your decision on which carrier system you buy.

    Condor RS Plate Carrier Video Review

  • Kodiak Defence Renova Action Review: Robust & Reliable Performance

    Kodiak Defence Renova Action Review: Robust & Reliable Performance

    The Kodiak Defence Renova Action is a robust and very well functioning action for precision sport shooting. It’s a Remington 700 clone yet it has a Sako Extractor – which is larger – to eliminate any failures to extract. It has a 6 lug floating bolt head, and uses two rows of three locking lugs, making it a light bolt lift and smooth throw.

    The Renova Action is worth it for anyone looking to build a solid and accurate precision rifle. I was incredibly impressed with how smooth the action moved. I never had a misfire either, and the accuracy of the rifle was impressive.

    renova

    Specs

    • Bolt Face: Small or Large
    • Hand: Left or Right
    • Extractor: Sako (Larger)
    • Barrel: Savage Pre-fit
    • Triggers: Remington 700
    • Action Screws: Remington 700 Spacing
    • Bolt Lift: 90 Degrees
    • Rail: 20 MOA

    Pros

    • Smooth action
    • Easy bolt lift
    • No failure to extract
    • Very compatible with other parts
    • Accurate
    • Affordable to competition

    Cons

    • Nil

    Price

    At the time of this article, the Kodiak Defence Renova Action costs around $1300.

    This price may seem high to some, especially when you can buy an already built rifle like the Savage Axis II Precision for around $1500. But when compared to other Action manufacturers, the Renova Action is very reasonably priced for those entering into competition shooting.

    A Canadian Precision Rifle Build

    Before we go into the details of this review, you may be wondering about this specific rifle build. So I’ll go over that here.

    The barrel of this rifle is a Savage Pre-fit barrel from JC Custom Barrels, just north of Moncton, New Brunswick. JC makes numerous pre-fit barrels for Rem 700, Rem 783, Savage, Ruger, and more. I went to visit his shop and was really impressed. So if you’re looking for a barrel for your rifle, definitely go check out his website at https://jccustombarrels.com.

    The chassis is the brand new MDT LSS Gen3 chassis with the tactical forend, skeleton carbine buttstock, angled pistol grip, and ORYX bipod. MDT is a phenomenal chassis company located in Chilliwak, British Columbia. This chassis setup is called the Tactical Kit for the LSS Gen3, and costs around $1350 + tax, which doesn’t include the bipod or AICS Magazine. You can read my full review here.

    renova

    The scope is made by a Canadian optics company, Scorpion Outdoors, and the specific optic I’m using is the Target Master Wildcat 6-24×50 TAC FFP, and I’ve been super impressed with it. The glass is great, excellent field of view, and has an illuminated reticle. If you’re looking for a Canadian-made affordable optic, then check out Scorpion Outdoors.

    The trigger of this Canadian rifle is a Trigger Tech Diamond Rem700 Single Stage trigger. This is the best trigger that I’ve owned, and even when others try using the rifle they are incredibly impressed with the trigger. The Diamond Single Stage Trigger has an adjustable pull-weight of 4 ounces to 4 pounds.

    I also have a Fake Suppressor on this rifle and that is made by Canadian company True North Arms. This fake suppressor is 5/8″ – 24 TPI, but True North Arms has numerous fake suppressors on their website with different threads and configurations, like a Reverse Fake Suppressor which threads over top of your barrel oppose to threading on like a conventional suppressor.

    6 Lug Floating Bolt Head

    One of the great design features of the Renova Action is the ability for it to have the bolt face swapped out. If you’re shooting .223 with a small bolt face but want to step it up and shoot 6.5 Creedmoor, now you can change the bolt face, swap the barrel, and you have a different caliber rifle to shoot.

    The bolt head also had 2 rows of 3 locking lugs which allows for a solid lock, a smooth throw, and light bolt lift. It feels incredible.

    SAKO Extractor

    renova action

    The extractor on the Renova Action utilized the same extractor found on SAKO bolt-action rifles. Sako is known for its reliable and robust extractor mechanism, which contributes to smooth and dependable cycling of rounds. By utilizing the same design, the Kodiak Defence Renova action will have a solid performance on the range. After spending numerous hours firing this rifle, I can honestly say it has worked phenomenally.

    Barrel Interface

    The barrel that will fit on the Renova Action is a Savage Pre Fit barrel. These barrels are very common in the sports shooting community and you can almost be guaranteed to find on either used or get one manufactured at a relatively affordable price.

    The other great thing about Savage Pre Fit barrels is that they don’t require a gun smith for installation. A quick video tutorial on YouTube to install and you’re on your way.

    Bolt Knob

    renova

    The bolt lift on the Renova Action is a 90 degree lift. This comes down to personal preference but I’m a fan of this bolt lift. The Renova Action Bolt Knob is a really good shape and size as well, making it easy to grab while keeping your eyes down-range.

    20 MOA Rail

    The picatinny rail on top of the action is a 20 MOA rail, which means you’ll be able to shoot targets or game at greater distances. Kodiak Defence doesn’t have other rails available, like a 0 MOA or a 30 MOA, but a 20 MOA rail is the perfect rail to have in my opinion.

    Spiral Fluted Bolt

    renova

    The Renova used a spiral fluted bolt, which is beneficial for a number of reasons. It allows the bolt to run smoother as it reduces the surface contact in the action, it reduced weight slightly, it can channel any dirt or debris away from the bolt surface which keeps it functioning well, and it simply looks awesome.

    Performance

    I’ve been very impressed while using the Renova Action on this rifle build. The rounds have been cycling flawlessly, it’s incredible smooth when extracting and chambering rounds, and the ergonomics and design of this action are incredible.

    When I’ve had my friends shoot this rifle, they are also very impressed. Of course everything doesn’t come down to the action alone. The chassis allows for the recoil to feel nicer in the shoulder, the trigger has no creep and feels crisp, but the action works very well to keep the user experience positive. Everything about this Canadian precision rifle is excellent.

    Conclusion

    The Kodiak Defence Renova Action is more than just a precision rifle action. it’s a testament to Canadian innovation and craftsmanship. Built entirely from components sourced through leading Canadian manufacturers, the Renova represents a collaboration of excellence in the firearms industry. From the rugged and reliable Renova Action by Kodiak Defence, to the premium triggers from TriggerTech, precision barrels by JC Custom Barrels, optics support from Scorpion Outdoors, and chassis compatibility with MDT, every part of this build reflects top-tier Canadian engineering. Even the fine details, like accessories from True North Arms.

    Whether you’re a competitive shooter, precision rifle enthusiast, or hunter looking for uncompromising performance, the Renova delivers on all fronts. It’s robust, accurate, and built to perform in the toughest environments. If you’re seeking a fully Canadian-made precision rifle platform that doesn’t cut corners, the Kodiak Defence Renova Action is what you’re looking for.